You are here:

Why You Should Sand Wood Floors at an Angle + Left to Right
Every day here we’re talking about doing things better, the internal stuff our staff does to make this shop hum and the ways to help you do better on the
job site.
We look at improving skills using Lägler sanding machines and maintaining those machines, repairs that keep your sanders in money-making shape for years
and years.
We hit up do-it-better on this blog and on our social media pages – Facebook,
Instagram and Twitter. We especially cover it during our one-day Lägler certification classes: Premium
Sanding Technology (PST®) training [Read: Lägler Certification: What Is Lagler PST®?]
And through our own practical experiences and by getting to know so many of you over the years in PST training, at NWFA’s Wood Flooring Expo, via social media, and on the phone, we know there is more than one way to get results
on the job.
Here’s the question. What kind of results are you aiming for: good, better or best?
The results we’re talking about in this post are top-tier, the results that help you solidify your business with referrals and craftsmanship that, maybe,
even is worthy of fatter paydays.
You handle your business and opportunities, of course, but we take pride in helping you refine your skills with these Lägler machines. (Not to be salesy
or anything, but did we mention PST certification?)
In the hopper today … sanding path and angles with the “big machine,” the HUMMEL.
Sanding Path for Straight-Laid Wood Flooring
Before you drop the drum and start cutting fresh life into a wood floor, you look at how to knock out the room as efficiently as possible, right?
Some sand right to left across the field, while others cut left to right (recommended, as explained below).
Many shoot straight, parallel with the floor boards. Others cut at an angle, slanting slightly across boards.
The Three Biggest Big-Machine Sanding Techniques We Recommend
Sand left to right as you move across the room.
Sand at an angle. We recommend 15 to 45 degrees [Source: Lägler’s “Sanding of Wooden Floors” manual]. The industry’s leading resource
[National Wood Flooring Association (NWFA)] cuts
slightly shallower with its first-pass recommendation of “a minimum seven to 15 degrees … More aggressive angles (up to 45 degrees) may be necessary
to achieve flatness in more extreme cases.”
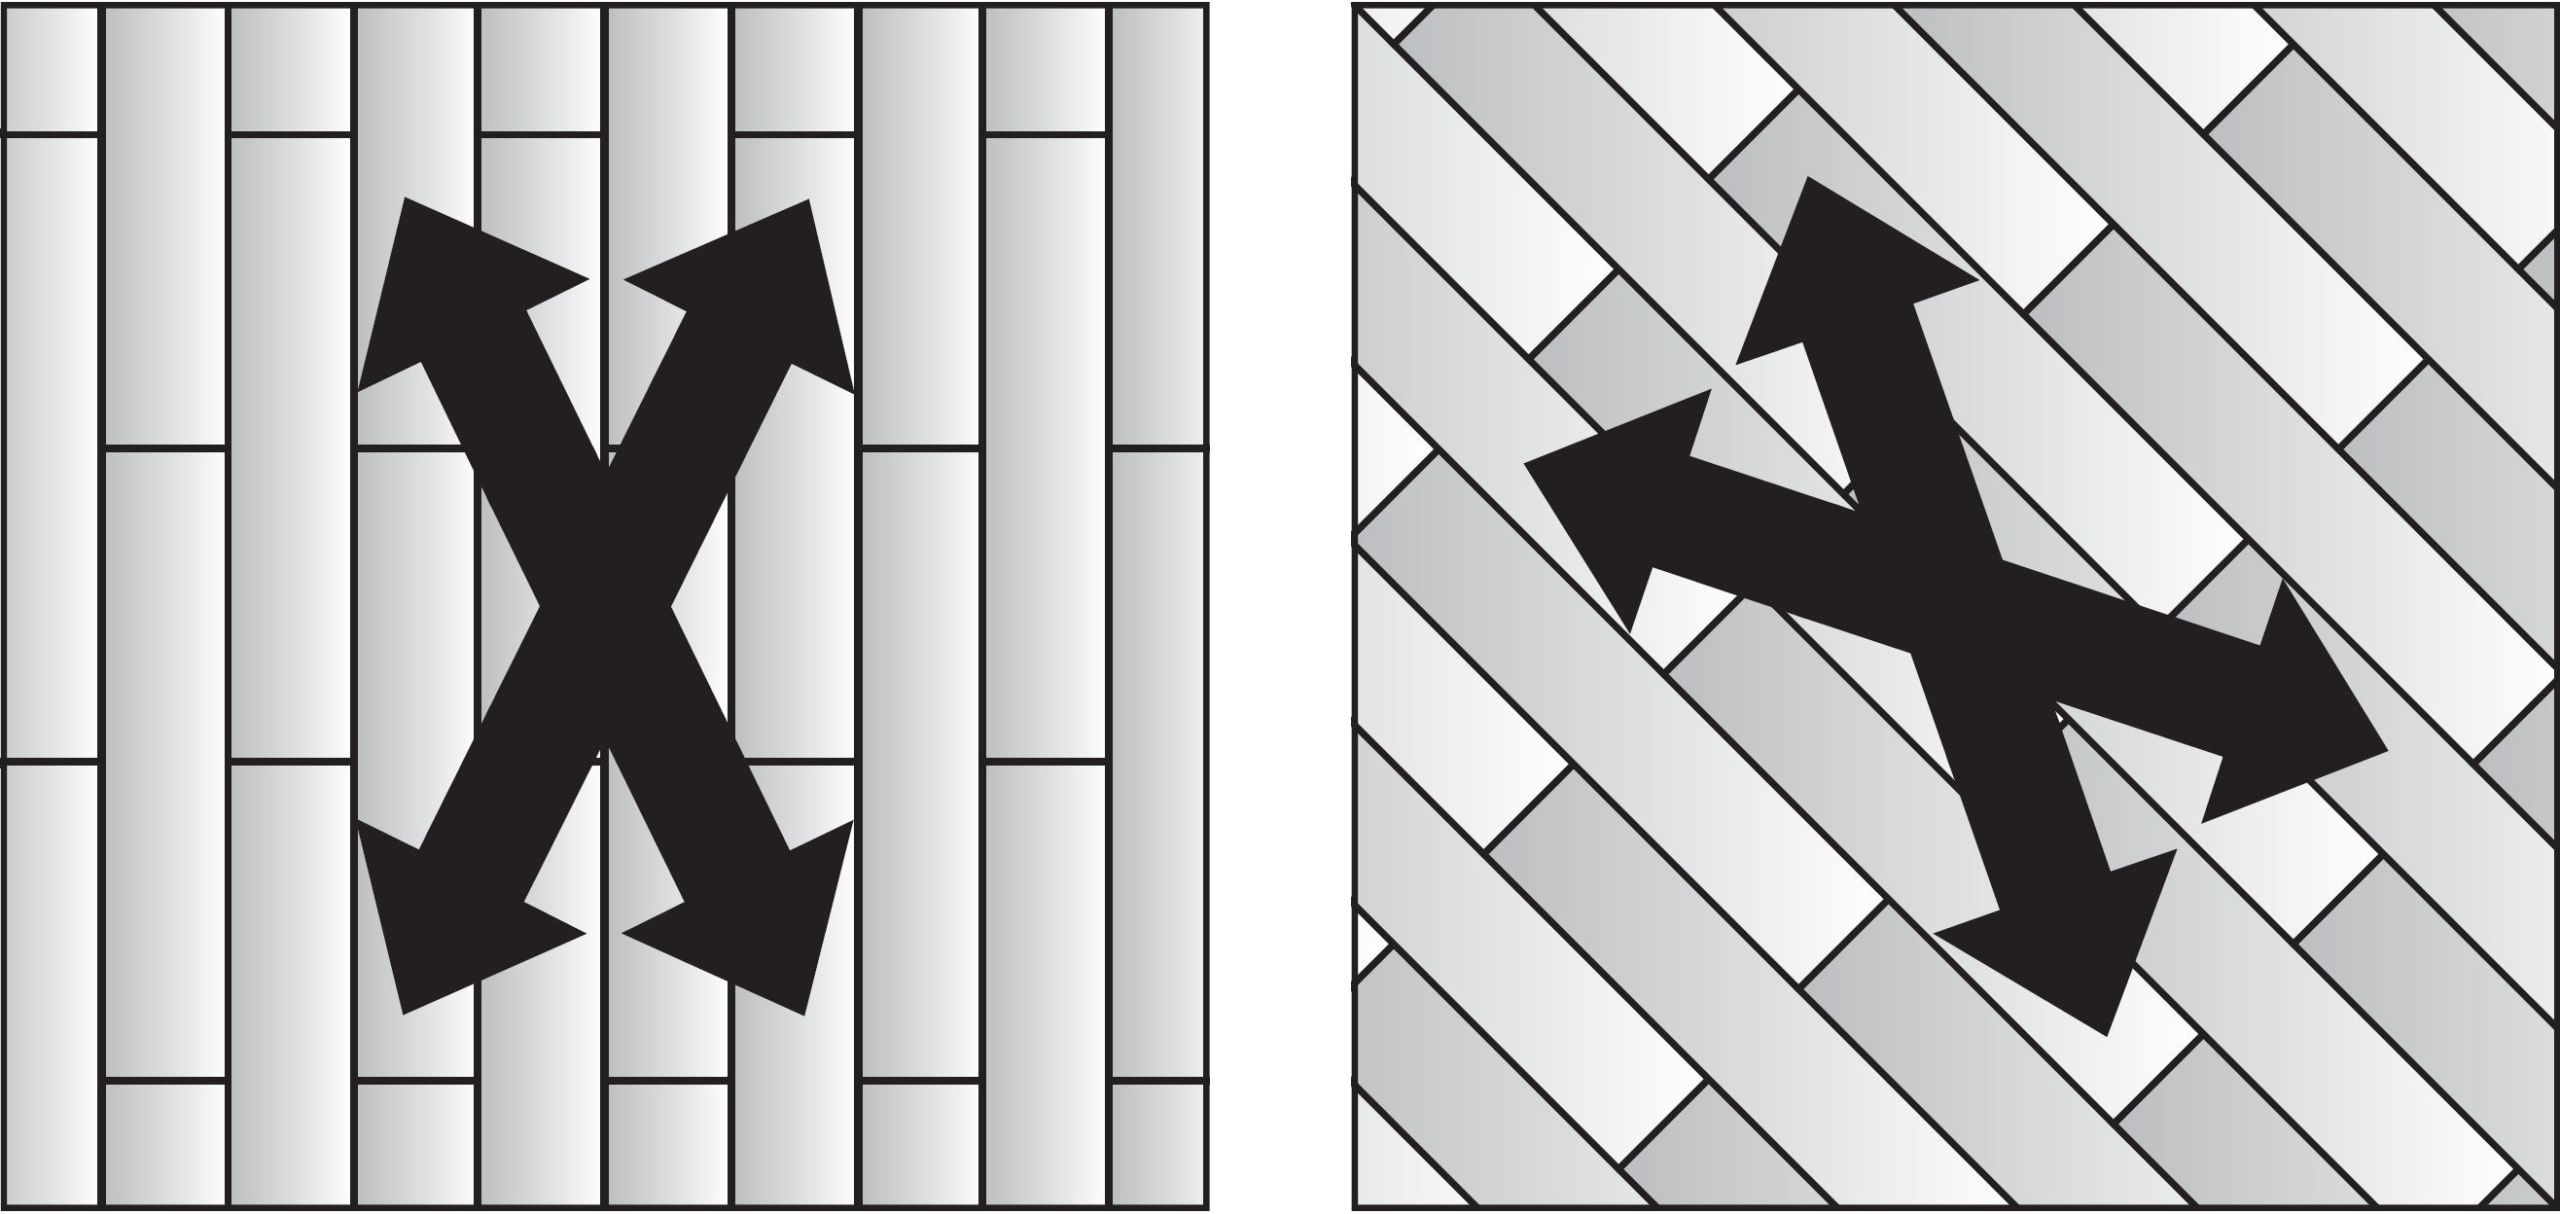
Criss-cross like an X. If you make your first pass sanding at an angle starting in the left corner (let’s call it home plate, as a reference
point), sand with the next grit at an angle starting from the right corner (first base). (All while moving left to right across the field)

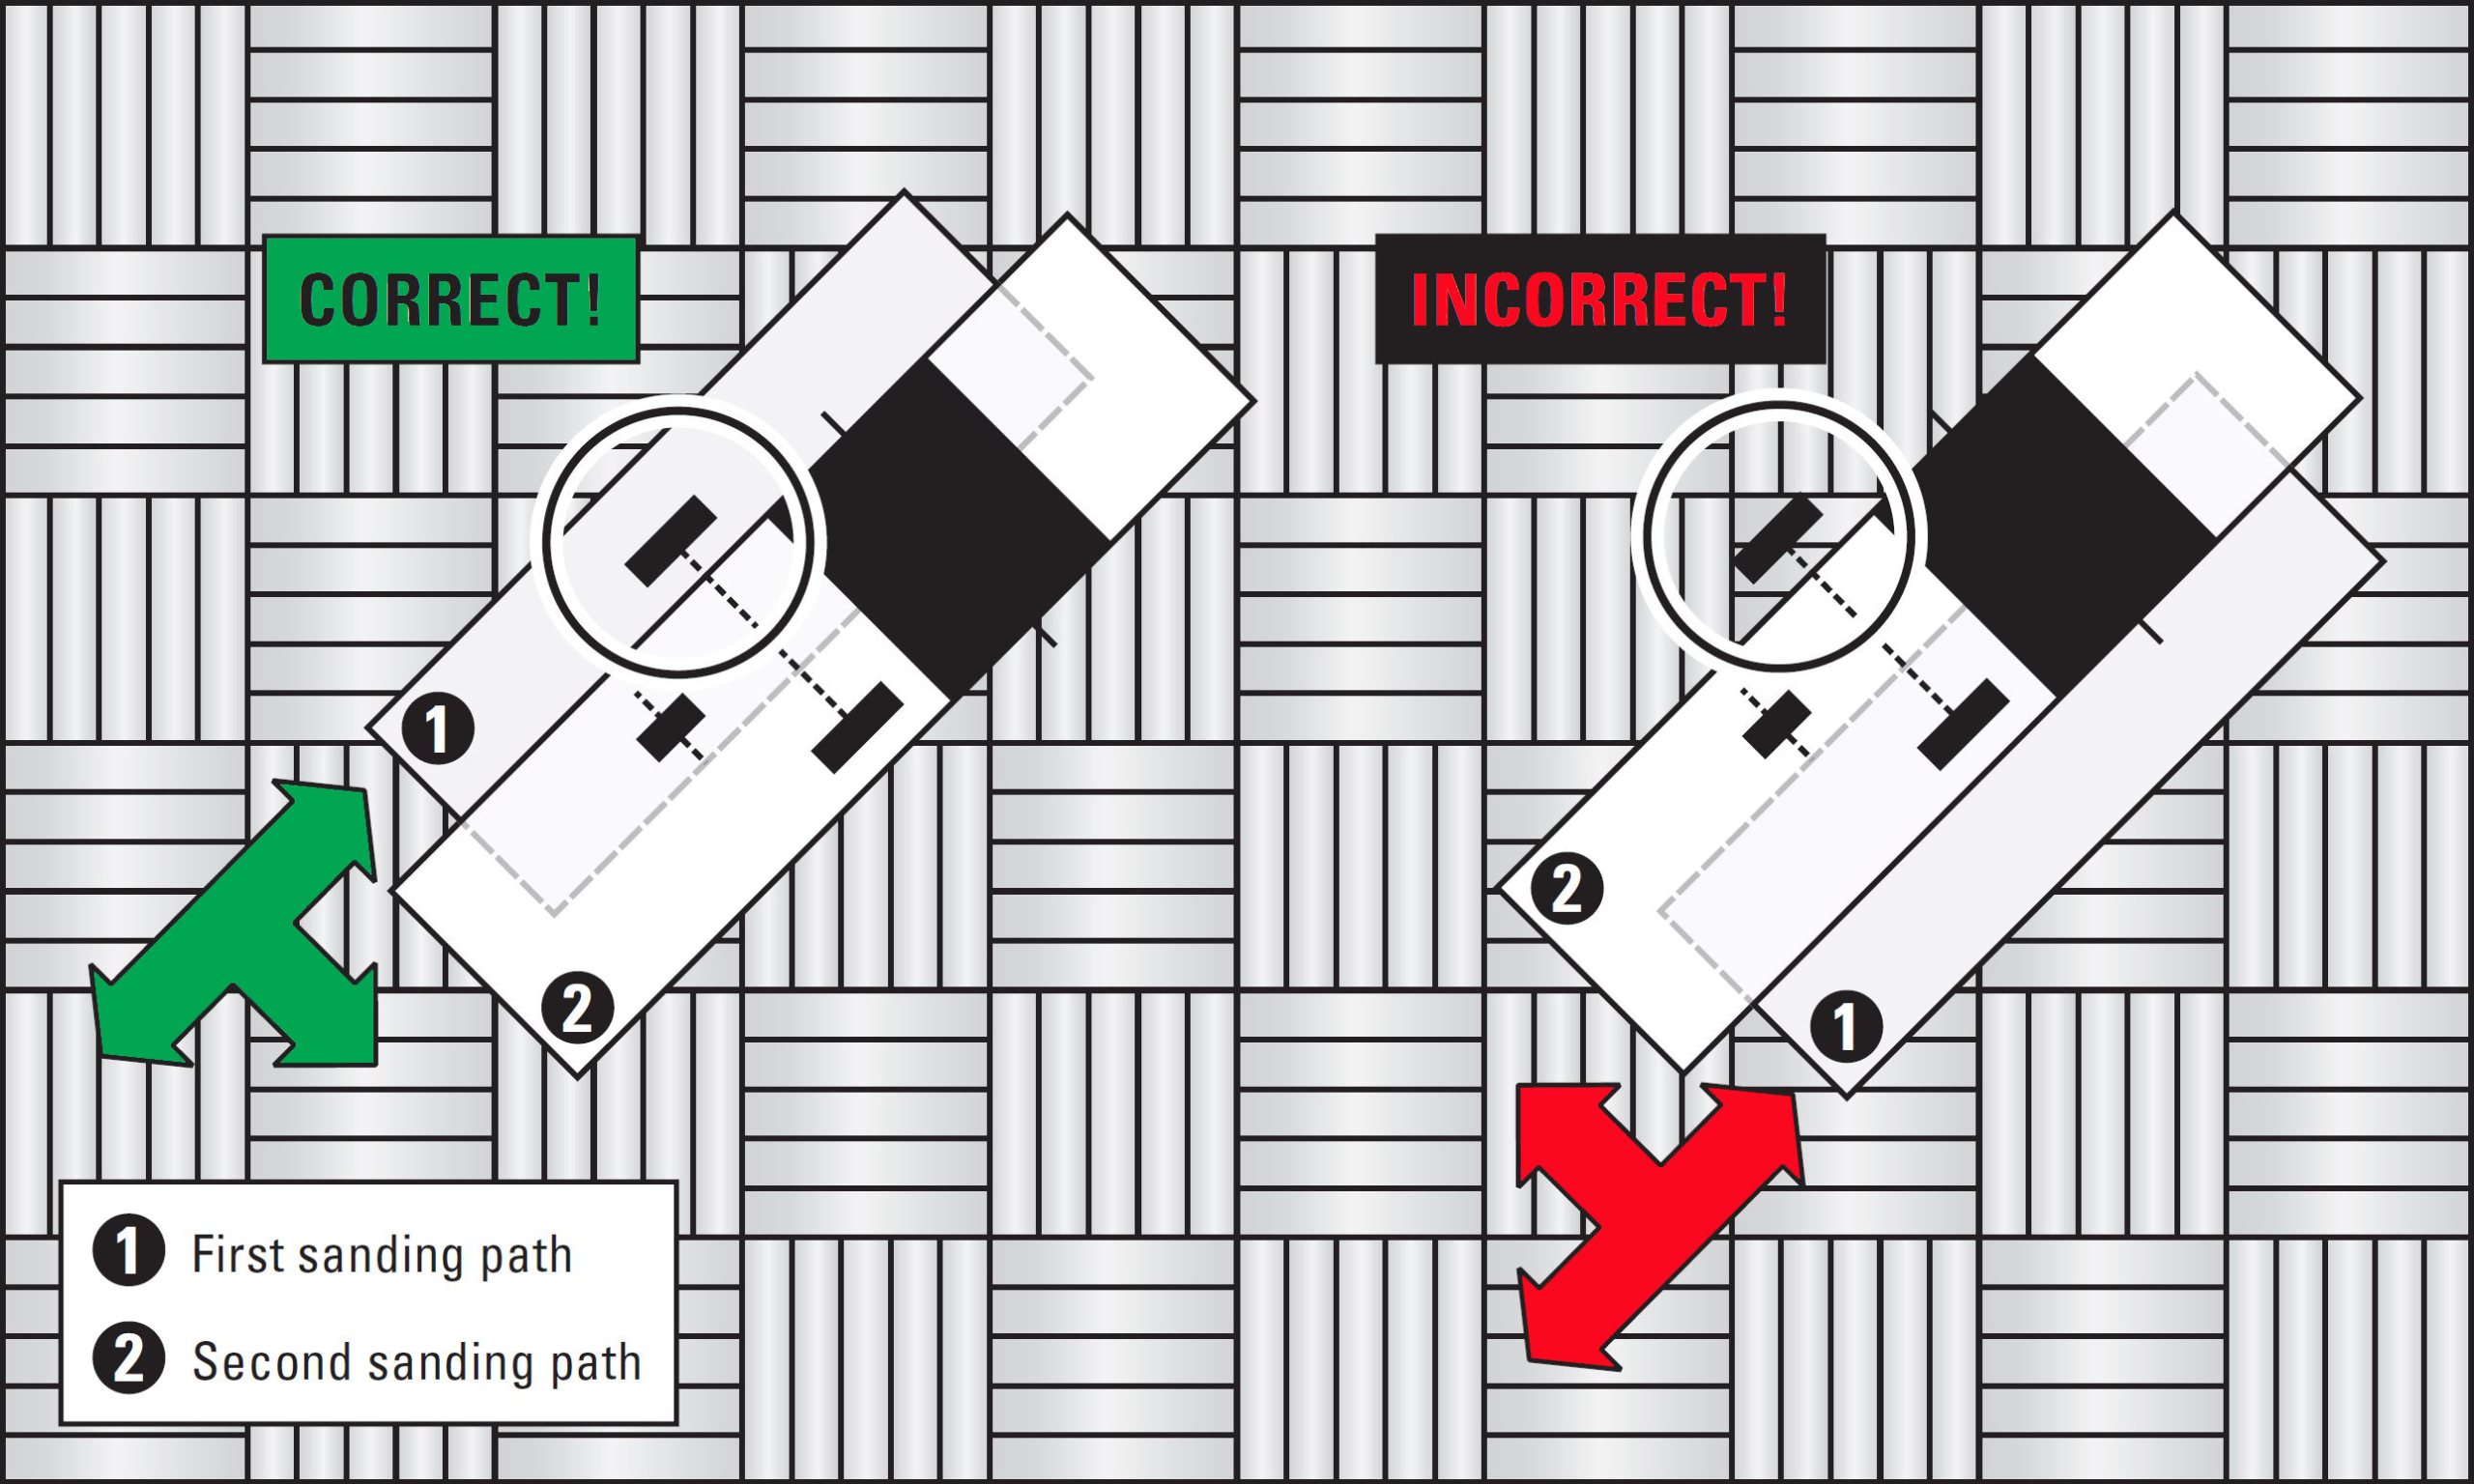
Why sand left to right with the Lägler HUMMEL?
The HUMMEL’s eight-inch sanding drum is positioned
at the right edge of the machine. The wheel that sits behind the drum, of course, will always run on the freshly sanded surface as it trails the drum
with the belt on it, sanding the floor.
Because the drum is on the right side of the HUMMEL, the left wheel runs on whatever surface – sanded or not yet sanded – the left side of the HUMMEL passes
over.
By sanding left to right across the field of the room, all wheels of the HUMMEL will run on the same sanded surface, meaning the machine
will be level and the floor will result in optimal flatness.
When sanding right to left with the HUMMEL, the machine is slightly off-balance, with the left side running on the surface yet to be cut.
Yes, that’s a minor difference. But, again, we are talking about good, better or best.

Why sand at an angle with the Lägler HUMMEL?
You know better than most what happens to wood flooring over time, especially when your sanding and refinishing mission is to bring back from the dead
a decades old (or older) floor with too many DIY coats of finish, paint, lacquer and who-knows-what on it to count.
Wear from use. Movement from the building settling and the floor shifting. Cupping, damage and neglect.
There are two ways to attack this demon with the HUMMEL: straight on or at an angle.
Obviously, we are doing this blog post to say, “angle.” But here’s why.
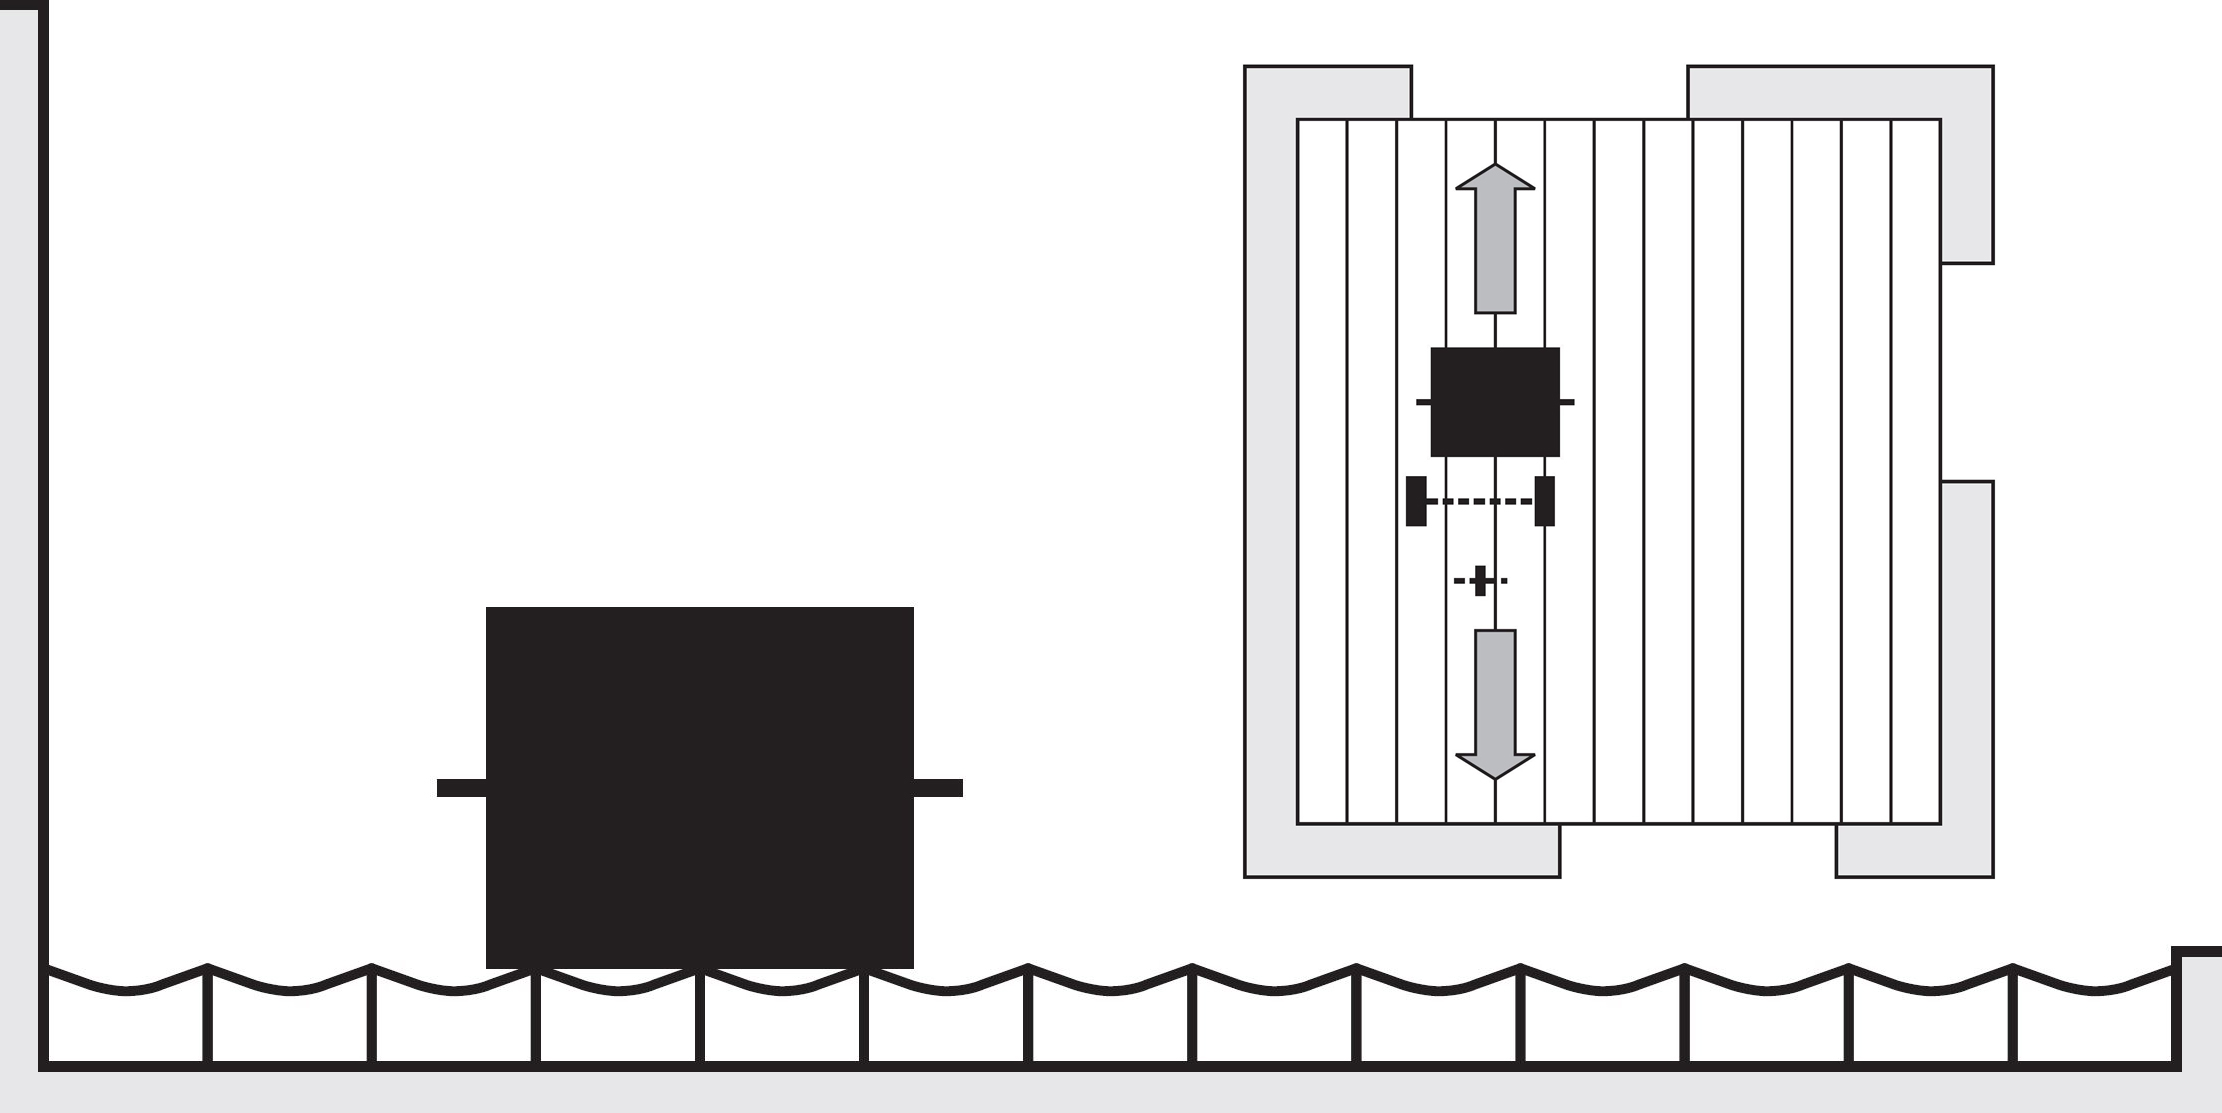
If you sand with the direction of the floor boards, you are maintaining what has happened to that floor over time. You’re giving it a
new look, no doubt. But the flatness …
When you sand at an angle, you are:
Until recently, Lägler recommended in its sanding methods manual to sand at an angle except for the final pass.
When sanding at an angle, at first, the scratch pattern will be more noticeable than when you cut with the direction of the floor boards. But as you sand
with increasingly finer grits and, especially, if you use a fine sanding machine (e.g. Lägler TRIO) in
the process, you will remove those scratches.
We now recommend to sand at an angle for all passes with the HUMMEL, following the correct grit sequence. That means never skipping more than one grit
in the process. Otherwise, everything we just said about flatness and removing scratch patterns is out the window.
Special Case: Sanding Cupped Flooring
Like always, there is an exception to the rules. When the floor boards are cupped, you’ve got to level them with a head-on approach.
Sand with the direction of the floor to knock off the edges of the cupped boards. Then go into the game plan described above, cutting at angles.

Sanding Direction for Multi-Directional Wood Flooring
Wood flooring patterns that make it impossible to run parallel to the floor layout, as is possible with strip flooring, call for sanding at a 45-degree
angle to the wood grain direction.
Basically, don’t sand with the lengthwise flow of any section of flooring. For example, when sanding herringbone or chevron patterns, sand across the intersections
of the floor boards. Otherwise, running with the length of some boards would mean running perpendicular across the width of other boards.
Like We Say, #LearnMoreEarnMore
We go more in depth about the sanding techniques that get you paid in our Premium Sanding Technology (PST®) certification training. It’s one-day-long,
with classes limited to one company and no more than five people at a time.
Bring your crew to our Denver spot, and make a mini-vacation out of it to ski, mountain bike, fly fish or just hit any (or all) of the 230 breweries in
our state (more than 10 percent of the total number in the U.S.). We might be able to make some recommendations on those too.
Learn more about PST on our blog
and call us at 800-8-HUMMEL to schedule a training date that works best for you.
Related Blog Posts
How to Remove the Lägler HUMMEL Motor

Lägler North America, a division of Palo Duro Hardwoods, is the North American distributor of machines and parts manufactured by Eugen Lägler GmbH in Germany. We are North America’s machine repair center, and offer Lägler’s one-day Premium Sanding Technology (PST®) certification course.
Copyright © 2020 Lägler North America. All Rights Reserved.