You are here:

A lot of floor sanding pros probably are confident in their “how to sand with a big machine” knowledge. Many of you should be. Yet here we are talking
about it, so hang with us …
We talk with flooring pros everyday about basic techniques and why they are the best way to go. In Lägler PST® training, when contractors and distributors
call us (800-8-HUMMEL, if you need it), at NWFA Expo,
answering questions via social media DMs – everywhere.
So, it’s worth double-checking your know-how and, at the least, you can send the new guy on your crew to this post and the many others we’ve put up on
the Lägler North America blog.
To help, here’s a list of the big machine blog articles we’ve posted in the past year:
If you have a copy of the Lägler sanding manual,
that’s the good stuff we base blog posts like this one on.
Choosing the Starting Abrasive Grit
We know when you start a job and get the big machine on the floor, you’re ready to rip. But how do you decide what grit abrasive to start with?
That decision right there – what grit to start with – can make or break efficiency on the job. It can lead to spending more time and money than you want,
if you don’t nail it.
If you start with too coarse an abrasive, you’re cutting deeper scratches that will take more effort to remove. If you go too fine, you’re creating more
work for yourself to go over it again.
Q: How do you know what grit you to start with?
A: Test sanding
Make your best guess of what grit belt to put on the drum to start the test, but go as fine a grit as you think will work. If the first grit you try isn’t
the one, move to the next grit you think is best. Testing doesn’t take long to do, and not nearly as long as the alternatives. It will save you headaches.
Always sand with as coarse a grit as necessary and as fine a grit as possible.
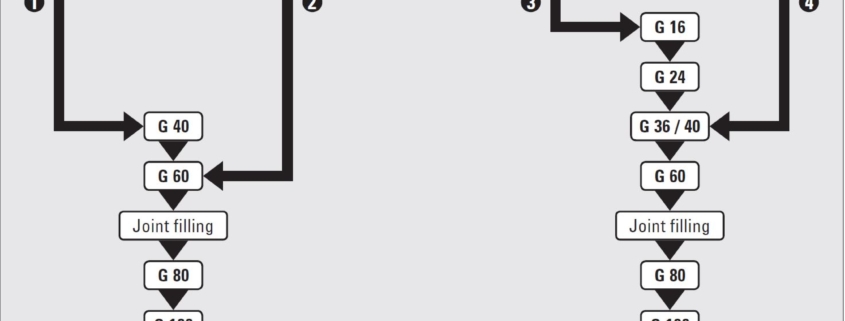
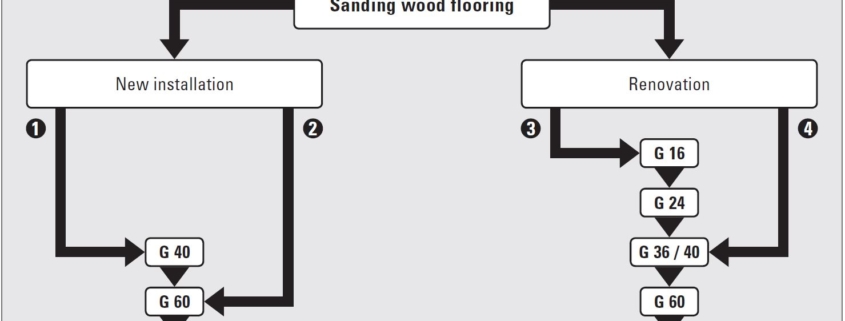
Below are two images from the Lägler manual, “Sanding of Wooden Floors.”
The first one shows how to approach grit sequence when using a multi-disc sander in your lineup.
The second one shows grit sequence when using the conventional setup, that is without using a multi-disc machine.
Learn more about best methods for using a big machine, multi-disc sander and edger. Read the Lägler N.A. blog and subscribe to the Lägler N.A. monthly email newsletter.


