You are here:

It seems to be something like an open secret that the Lägler FLIP® is engineered for versatility. The information is out there, in Lägler’s “Sanding of Wooden Floors”
manual and in some pieces already on this blog.
But we know how it goes. We haven’t read many manuals either – not for connecting a new device, assembling the kid’s new Hot Wheels race track, or whatever.
So, we’re laying out the essentials here on how you can get the most out of the FLIP.
The edger uses a 6” (150 mm) disc. It can be used to cut
aggressively, finely or on a medium setting, all adjustable with the turn of the rollers.
Sanding attachments can be “flipped” to swap out lengths and diameters, from everyday edging to reaching under radiators and cabinets, to sliding into
tight spots like corners and between spindles.
Versatility.
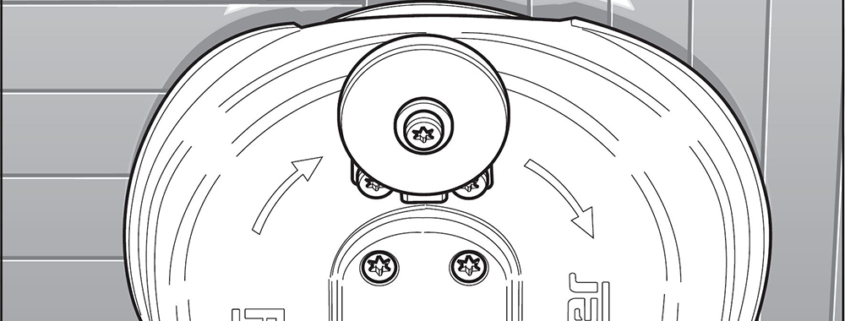
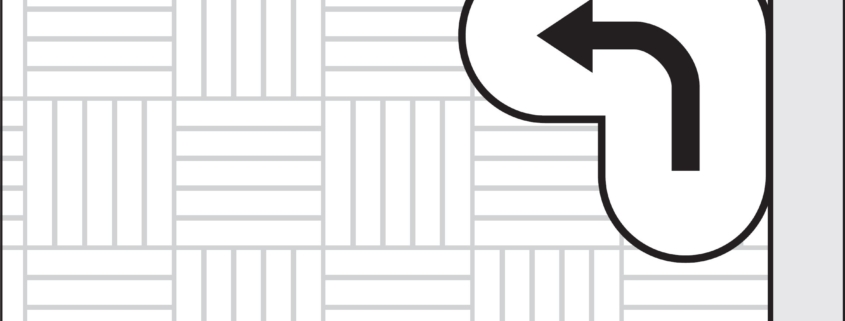
1. Sand clockwise. The FLIP is designed for edge sanding clockwise around a room. The sanding disc rotates clockwise, cutting at the 12
o’clock position. The fiberglass cover of the FLIP’s attachments has a cutout directly over the sanding zone, optimizing its dust suction capability.
(What the super-short video of the FLIP being used to vacuum a pile of dust, and you’ll see what we mean.)
What happens if I sand in a counter-clockwise path around the room? Moving counter-clockwise around the edge of a room will not damage the FLIP.
It will give you a more aggressive cut as you move the edger against the clockwise rotation of the abrasive, which, of course, also means deeper scratches
you will need to work harder to remove later. It also will decrease dust collection, because the clockwise rotation and the suction are designed to
work optimally together.

2. Take it easy. Do not press down. The FLIP’s design takes ergonomics into account. It’s built to make edging a
bit easier on your body. If you press down or lean your weight onto the machine, it will decrease the sanding plate speed and give you uneven sanding,
including burn marks. It also will put unnecessary stress on the machine.
So, take it easy. It helps you, the machine and the floor.
3. Choose the right grit abrasives at the right time. If you just sanded the field of the room with your big machine
using a 40-grit belt, use 40 grit on your edger. If you just edged with 80 grit and you’re moving on to your single-disc or multi-disc sander, use
80 grit with that machine.
The last thing you want is for the homeowner to walk in and be able to see a band around the edge of the room where it doesn’t match with the field. Successful
floor sanding is one of those mysteries you get to keep to yourself and let them wonder how you made their floor look so awesome. If they can see how
the magic is made, it ain’t being made well.
Bonus Tip: The white wheel that is screwed onto the top of the short/standard and long FLIP attachments is your wall roller. Notice the
track it sits in allows you to set the position of the wheel. Just loosen the screw, adjust the wheel to let you closer or farther from the wall, tighten
the screw.
Don’t let the name of the FLIP corner attachment fool you. It’s not just for corners.
In fact, when this attachment is at its most valuable to you probably is not in the corners. It’s sliding between spindles, around tight spots with radiators,
getting around pipes, and anywhere else a 6” disc isn’t the machine for the moment.
The corner attachment has a 2 3/8” (60 mm) diameter. And it rips fast, with RPMs cranking almost two and a half times as fast as the FLIP’s short and long
attachments you do most of your edging with.
1. Sand counter-clockwise. Yeah, that’s opposite of what we are saying above when sanding with the short
and long attachments. But, in general, you’re quick-hitting small spots where you’re not going to be running along the wall, right? Not much room to
run between spindles. So, this is just a heads-up, letting you know how the attachment is designed to be used.

2. Use the flexible Velcro ring. Always. Sand with the donut between the abrasive and the sanding disc.
3. Use the finest grit possible. Like a boxer, you want to minimize your time in the corners, don’t you? And keep
the bonus tip in mind, too …
Bonus tip: The speed of rip of the corner attachment sanding disc heats up the abrasive pretty quickly. Tip #3 above spotlights fine grits,
which will reduce some of the need to change paper, but when it’s time for a new abrasive, be aware the heat can melt the abrasive to the donut.
1. Take a water break. Set the FLIP aside for a brief cool down period before pulling the abrasive off the machine.
2. Tag team. Keep a second donut and abrasive ready to go. You can swap in the fresh set keep grinding while the first set is cooling
down.
All this information is in two of Lägler’s manuals: “Sanding of Wooden Floors” and “FLIP Operation, Maintenance, Safety.”
Both are available for free download at laegler.com.
It’s also part of Lägler’s Premium Sanding Technology (PST®) certification training.
You can schedule that for you and your crew with us in Denver, or make a European vacation of it by heading to England or Germany.
How to Minimize Sanding Efforts + Maximize Business Profits

Lägler North America, a division of Palo Duro Hardwoods, is the North American distributor of machines and parts manufactured by Eugen Lägler GmbH in Germany. We are North America’s machine repair center, and offer Lägler’s one-day Premium Sanding Technology (PST®) certification course.
Copyright © 2020 Lägler North America. All Rights Reserved.